How to create a RentCafe account
Summary
To create a RentCafe account, visit RentCafe.com, click “Login” and follow the prompts to sign up with Google, Apple or your email. You can also create one by adding a property to your favorites or saving a search. The account is free and gives you access to a personalized dashboard to save listings, set up search alerts, apply for apartments and track applications — all in one place.
A RentCafe account is for renters who are actively looking for an apartment or house to rent. It’s free and gives you access to features that make your search easier, including the ability to save favorite listings, set up search alerts and apply for rentals directly through RentCafe.com.
You do not need an account to browse listings on RentCafe. However, creating one unlocks helpful tools that can save you time during your apartment search.
What you need before you start
To create an account, have the following ready:
- A valid email address or a Google account
- Your full name and phone number
How to create your RentCafe account step by step
1. Go to RentCafe.com
Open your browser and visit RentCafe.com.
2. Click “Login”
Select “Login” from the menu in the upper right corner of the page.
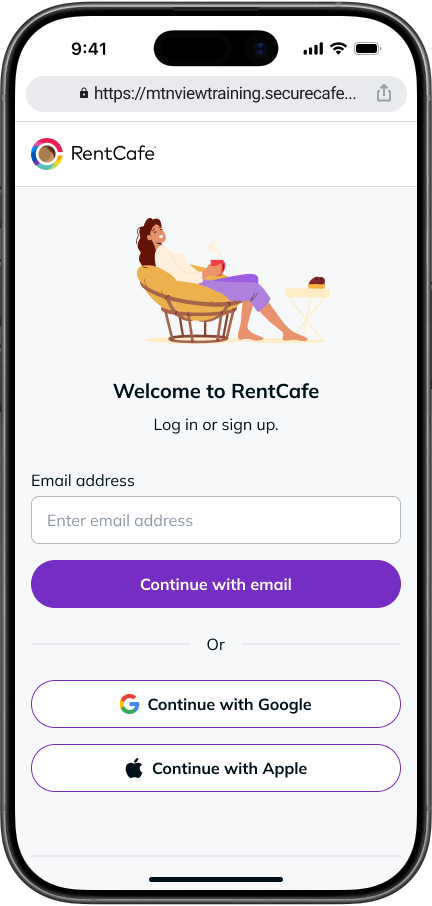
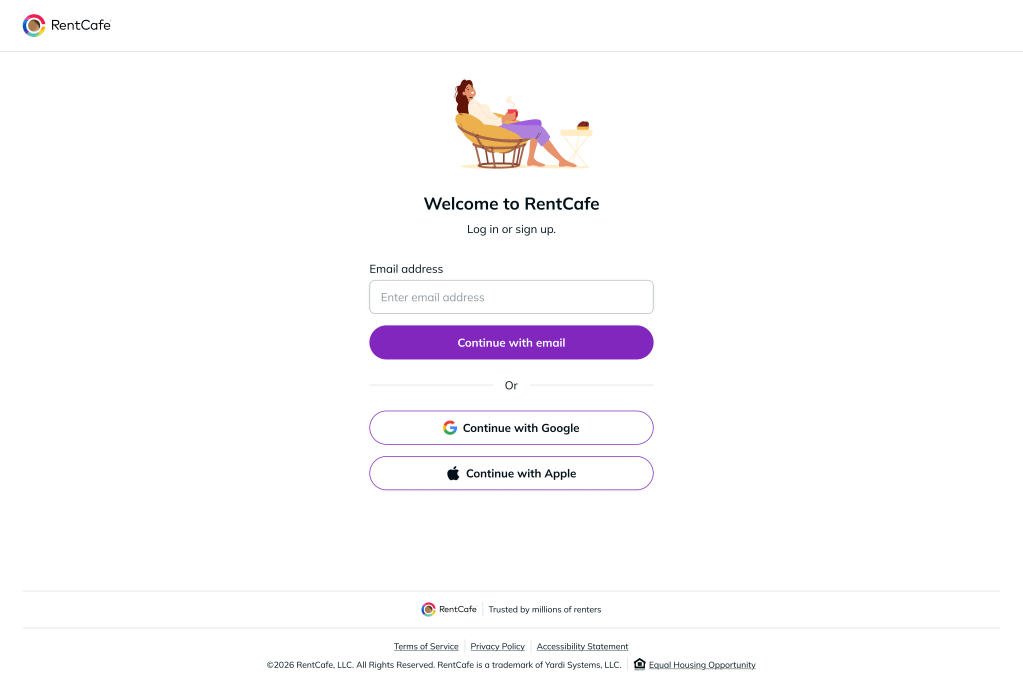
3. Enter your email or choose a sign-in method
On the login page, type in your email address and tap “Continue with email.” Alternatively, you can choose to sign in using a Google or Apple account.
4. Verify your email
If you entered your email address, check your inbox for a one-time verification code. Enter the code on the login screen and click “Verify email.” If you didn’t receive the code, you can request a new one from the same screen.
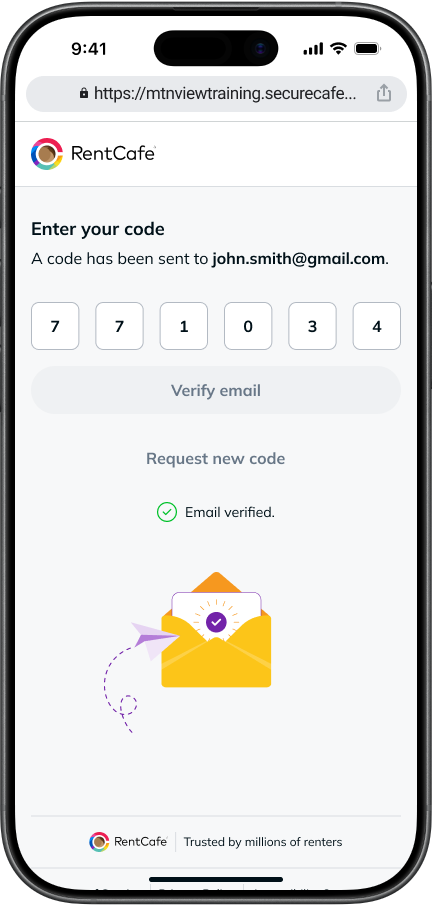
Tip: You can also tap the “Verify my email” button directly in the email message to skip entering the code manually.
5. Sign up with Google or Apple
If you choose to continue with Google or Apple, your email is verified automatically through your existing account. You’ll skip the code step and go straight to filling in your details.
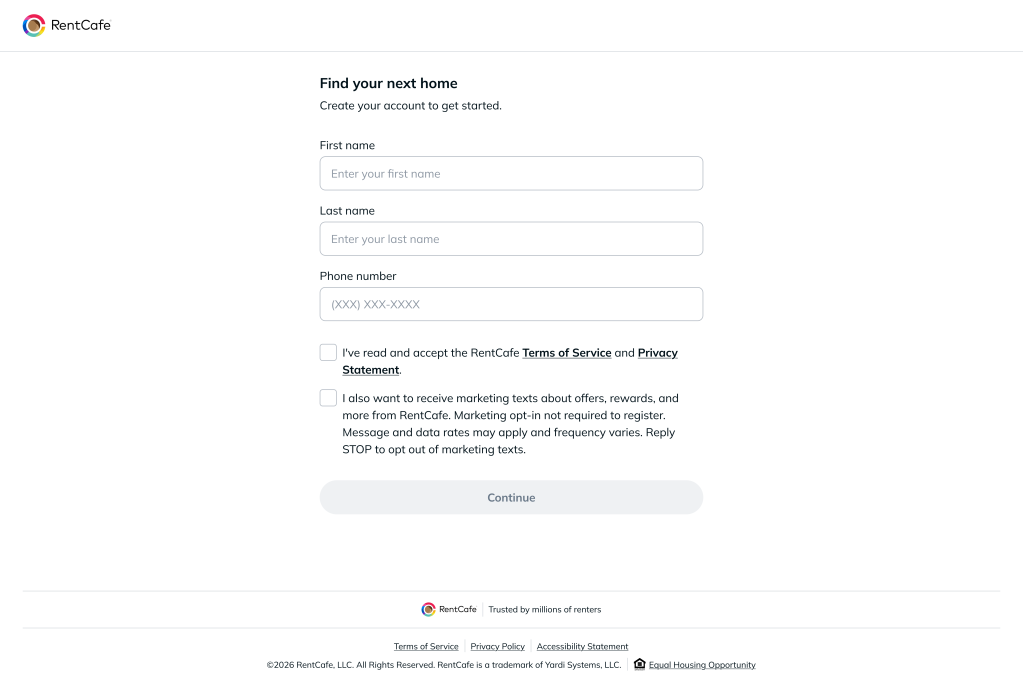
6. Add your personal details
Enter your first name, last name and phone number. Check the “Terms of Service” and “Privacy Statement” box, then click “Continue.”

Tip: If your phone number matches one in an existing account, you can continue signing in by using that account or choose to create a new one.
7. You’re all set
Your RentCafe account is now created, you are logged in and you can start searching for rentals.
1. Go to RentCafe.com
Open your browser and visit RentCafe.com.
2. Click “Login”
Click on the “Login” button in the upper right corner of the page.
3. Enter your email or choose a sign-in method
On the login page, type in your email address and tap “Continue with email.” Alternatively, you can choose to sign in using a Google or Apple account.
4. Verify your email
If you entered your email address, check your inbox for a one-time verification code. Enter the code on the login screen and click “Verify email.” If you didn’t receive the code, you can request a new one from the same screen.
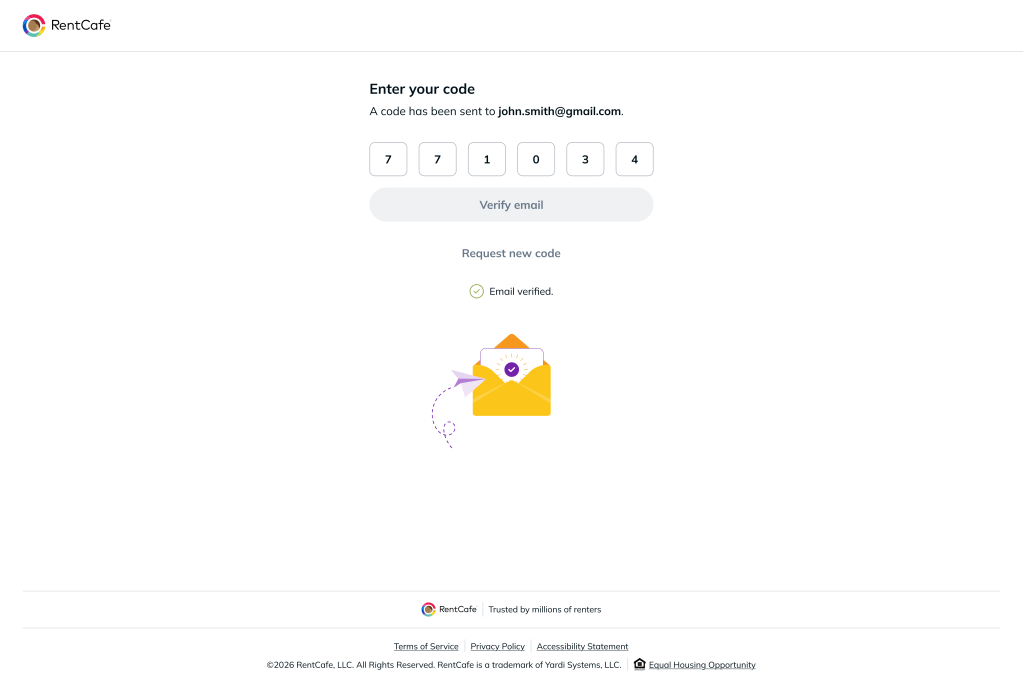
Tip: You can also click the “Verify my email” button directly in the email message to skip entering the code manually.
5. Sign up with Google or Apple
If you choose to continue with Google or Apple, your email is verified automatically through your existing account. You’ll skip the code step and go straight to filling in your details.
6. Add your personal details
Enter your first name, last name and phone number. Check the Terms of Service and Privacy Statement box, then click “Continue.”
Tip: If your phone number matches one in an existing account, you can continue signing in by using that account or choose to create a new one.
7. You’re all set
Your RentCafe account is now created. You are logged in and can start searching for rentals.
That’s it — your RentCafe prospect account is ready to use.
Another way to create a RentCafe account is by adding a property to favorites or by saving a search. By clicking the heart icon or “Save search,” you are guided to the main login screen, where you can sign up with your email, Google or Apple. From there, just follow the steps above and you’ll be ready to go.
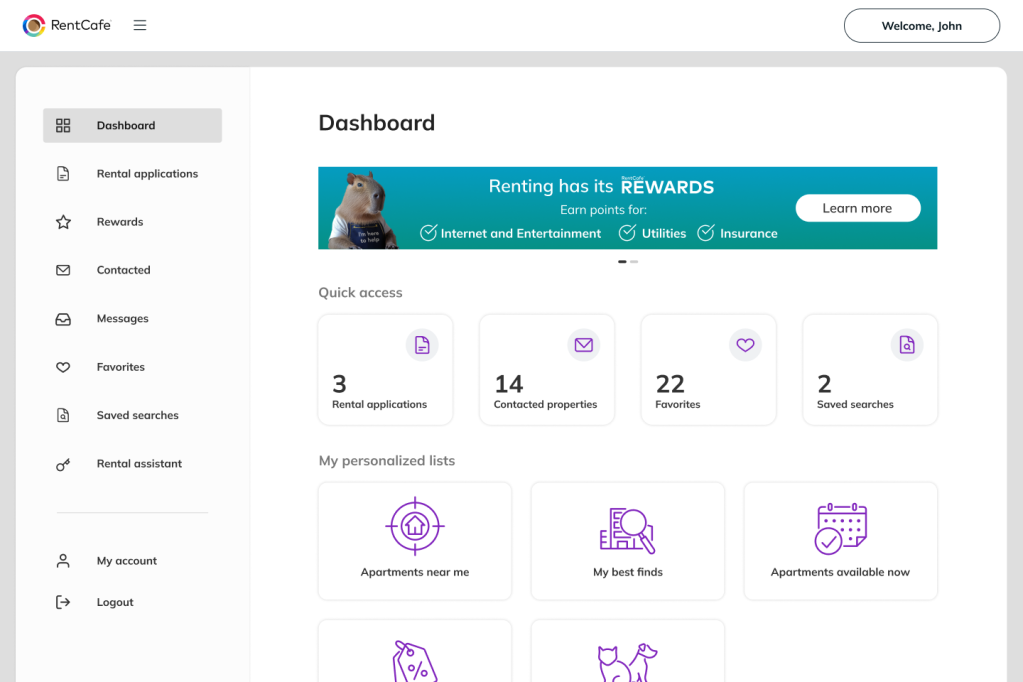
What you can do with a RentCafe account
Once you’re logged in, your account gives you access to a personalized dashboard where you can:
- Browse and search rental listings across the U.S. and Canada
- Save your favorite rentals to revisit later
- Save searches and get notified when new matches appear
- View properties you’ve contacted
- Apply for apartments and track your application status
- Update your profile and account details at any time
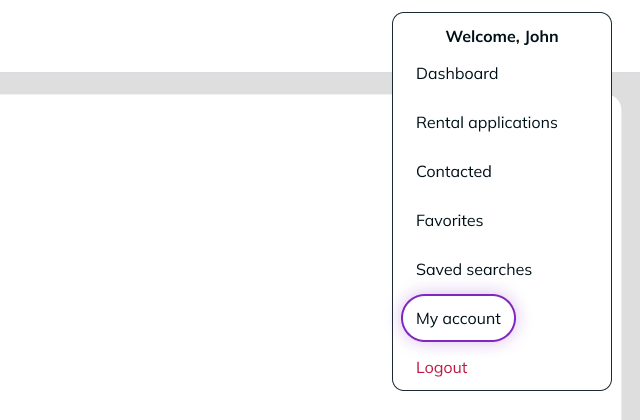
To access your dashboard, select “My account” in the main menu (upper right corner of the page) after logging in.
Tip: Once you apply for an apartment, your account expands to include application tracking. After you’re approved and your lease is signed, you’ll get access to resident features like online rent payments, maintenance requests and more — all from the same account.
Ready to get started? Visit RentCafe.com to browse listings and create your free account.
FAQ
No. You can browse listings on RentCafe.com without creating an account. However, a free prospect account lets you save favorites, set up search alerts and apply for apartments.
Yes. Creating a prospect account is completely free. Some properties may charge separate application fees or move-in costs, but RentCafe does not charge for signing up or using the platform.
A prospect account is for renters who are searching for a place to live. A resident account is for renters who have been approved and moved into a property. Your prospect account automatically switches to a resident account once your application is approved and your lease is signed.
Yes. During the sign-up process, you can choose to create your account using an existing Google account instead of entering your email manually.
Log in to your RentCafe account and click the profile button in the upper right corner of the screen. From there, you can edit your name, phone number, email and other account details.